I've come across a few recipes for squash enchiladas in the past couple of years, and my first thought was
"Really, Squash? In enchiladas?? Weird!"
Everyone I've shared the idea with seems to have the same reaction, with varying degrees of horror and/or "Ew gross!"
But, I'm here to tell you- squash enchiladas are actually really good.
They are surprisingly filling and the sweetness of the squash balances really nicely with the flavors of peppers and garlic and my personal favorite, cumin.
If you have an abundance of squash that you don't know what to do with and are so inclined to try new foods, here is a recipe for you!
Honestly, I've made them different every time, using whatever ingredients I had on hand that I thought would taste good. This last time I made them I liked it better than last time, so I'll share the current favorite recipe. :)
Squash Enchiladas
By Becca Swan
Makes 6 enchiladas
1/2 onion, diced
1 clove garlic, diced
1 cup cooked rice
1 cup corn kernels (I cut mine off the cob but feel free to use fresh, canned or frozen- whatever you have)
2 cups winter squash, cut into 1 inch cubes
shredded cheese for sprinkling (cheddar, monterey jack are especially good)
6 flour tortillas
2 tbsp taco or enchilada seasoning (or your own favorite blend of spices that include cumin, paprika, chili powder, etc.)
sour cream (optional)
Enchilada sauce or salsa (enough to pour over the top of enchiladas)
Heat a pan on med-high, put cooking spray in it or use around 2 tbsp olive oil to grease it.
Add onions and garlic, stir and cook til onions are translucent.
Pour in squash cubes, add salt and pepper, cook for around 5-10 minutes, til the squash starts to soften. Reduce the heat to medium if need be, to keep the squash from burning.
Add rice and corn and seasoning, stir and cook til warmed through.
Remove from heat.
Assemble your enchiladas.
In a 9x13" baking dish, place tortilla, layer squash mixture, cheese and sour cream (if desired) down the middle of the tortilla. Roll tortilla up and place so the loose ends are under the enchilada. Repeat until your pan is full.
Drizzle salsa or enchilada sauce over the top of your enchiladas, then sprinkle some more cheese over them for good measure. :)
I used tomatillo salsa this time and MAN was it good! It added a really nice tang to the dish and I highly recommend it if you like tomatillos. If not, stick with regular enchilada sauce or salsa.
Bake in a 375 degree oven for 20-25 minutes, til cheese on top is melted and slightly browned.
Enjoy with a nice salad or chips and salsa.
If you have people in your family who are skeptical about the squash enchiladas, you can always make a pan of chicken or beef enchiladas as well; that's what we do since my kids and my brothers are not fond of squash at all. :)
Showing posts with label recipes. Show all posts
Friday, November 16, 2012
Friday, August 10, 2012
Banana-Zucchini Bread- A healthy version
It's zucchini season and no doubt if you have zucchini growing in your garden or you've visited the farmer's market or the grocery store lately you've seen it everywhere.
I've seen it on sale like crazy, and I don't have any zucchini plants growing in my garden. I did, but they got eaten by snails or slugs or something. :(
Anyway, I actually found this recipe because I had some bananas that were on the verge of going bad and didn't really feel like freezing them plus I had some frozen zucchini from early spring; that I needed to get rid of (we're working on eating through everything in our freezer) so I thought I'd make some banana/zucchini bread to use it up!
I found the original recipe on Allrecipes.com (click here for the link) but as always, I modified it a bit.
So here's my modified version:
Beat 3 eggs til they are foamy.
Add:
3/4 cup olive oil,
1 cup organic sugar,
1 cup grated (and extra juice squeezed out if it's been frozen) zucchini
3 bananas, mashed
1 tsp vanilla
Mix!
I didn't actually mash up the bananas first since I was using my stand mixer- it did the job just fine for me.
Next, add your dry ingredients.
3 1/2 cups whole wheat flour
2 tsp. cinnamon
1/8 tsp. allspice
1 1/2 tsp baking powder
1 tsp baking soda
1tsp salt
Mix again, til everything is well combined.
Pour into two greased loaf pans and stick in a 325F oven for 50 min,
or until a knife comes out clean when you poke it into the middle of the loaf.
I only used 1/2 cup of oil because 3/4 sounded like too much, but then my bread ended up a bit dry. Not horrible, but I should've just followed the directions there! Or added another egg or something.
I like how it turned out though, minus the slight dryness.
Hubby says it isn't dry, but I think it is just a tad.
We've already eaten one of the loaves, and the other one will probably be gone by tomorrow afternoon.
So if you have some zucchini sitting around waiting to be used, go ahead and make some zucchini bread! :)
I've seen it on sale like crazy, and I don't have any zucchini plants growing in my garden. I did, but they got eaten by snails or slugs or something. :(
Anyway, I actually found this recipe because I had some bananas that were on the verge of going bad and didn't really feel like freezing them plus I had some frozen zucchini from early spring; that I needed to get rid of (we're working on eating through everything in our freezer) so I thought I'd make some banana/zucchini bread to use it up!
I found the original recipe on Allrecipes.com (click here for the link) but as always, I modified it a bit.
So here's my modified version:
Beat 3 eggs til they are foamy.
Add:
3/4 cup olive oil,
1 cup organic sugar,
1 cup grated (and extra juice squeezed out if it's been frozen) zucchini
3 bananas, mashed
1 tsp vanilla
Mix!
I didn't actually mash up the bananas first since I was using my stand mixer- it did the job just fine for me.
Next, add your dry ingredients.
3 1/2 cups whole wheat flour
2 tsp. cinnamon
1/8 tsp. allspice
1 1/2 tsp baking powder
1 tsp baking soda
1tsp salt
Mix again, til everything is well combined.
Pour into two greased loaf pans and stick in a 325F oven for 50 min,
or until a knife comes out clean when you poke it into the middle of the loaf.
I only used 1/2 cup of oil because 3/4 sounded like too much, but then my bread ended up a bit dry. Not horrible, but I should've just followed the directions there! Or added another egg or something.
I like how it turned out though, minus the slight dryness.
Hubby says it isn't dry, but I think it is just a tad.
We've already eaten one of the loaves, and the other one will probably be gone by tomorrow afternoon.
So if you have some zucchini sitting around waiting to be used, go ahead and make some zucchini bread! :)
Wednesday, August 1, 2012
A Simple Snack Recipe: Stove-Top Popcorn
Hi, I realized a few days ago that it's been awhile since I shared any recipes with you all, so here is a quick, easy, healthy snack that we love to enjoy.
Once you make it, you may never go back to microwaved popcorn. (At least I hope so. That stuff is NOT very good for you.)
If you've ever had old fashioned, stove popped popcorn you know that it is delicious and fluffy and devoid of all of the chemical "butter" you find in microwave popcorn or that gargantuan tub of heart-attack causing movie theater popcorn.
I remember as a kid my mom making huge amounts of popcorn and then we'd salt and butter it and pour it into a paper grocery bag to take to my uncle's football games in the fall. It would be cold and windy and more often than not it would be rainy but with warm woolen blankets and salty, delicious popcorn it was well worth it to sit for a few hours and watch him play until our fingers got numb and our noses got red and my brother and I nearly fell asleep, then we'd head for our nice cozy home and fall into our toasty warm beds.
I love making popcorn for our kids, and they love to help. It's so much fun for them to pick out a few yellow kernels and drop them into the sizzling oil, then when it pops they make a game out of trying to catch the kernels as they pop out, sometimes onto the kitchen floor. ;)
Here's how we make our stove-top popcorn: it's super easy, I don't even measure!
You need:
~A big pot with a lid, preferably a heavy-bottomed one so that the heat is distributed evenly across the pan.
~Oil of some kind. I usually use olive oil because it's healthier than canola and gives the popcorn a nicer flavor.
~Popcorn, of course! If you can, get the organic kind because the regular kind is almost certainly genetically modified. We go back and forth between organic and regular, depending on how much money we have that month.
~Salt or topping of your choice
~A big bowl
The How To:
Put your pan on the stove, turn it up to the highest heat setting and pour enough oil in to cover the bottom of the pan.
Take two or three or four kernels and drop them into the pan. This is a good place for your kids to help, because the oil isn't hot enough yet to burn them.
Leave the lid off, and wait for those kernels to pop.
When they pop, your oil is hot!
Dump in enough popcorn to cover the bottom of the pan, put the lid on (quickly!) and let them pop away!
Shake the pan back and forth on the burner a few times, so that the popped popcorn doesn't burn while the rest of the kernels are still popping.
When the popping slows down to just a few pops here and there (or when you smell it starting to burn!), turn off the heat and leave the lid on for a few more seconds to give those last few kernels a chance to pop and then pour your nice hot popcorn into a big bowl and salt it up and enjoy!
We don't use butter on our popcorn, with the olive oil you don't really have to. It leaves the popcorn nice and flavorful without the extra saturated fat that butter gives you.
You can sprinkle other toppings on as well, like nutritional yeast for a healthy but cheesy flavor, or cinnamon and sugar for a "dessert" popcorn or whatever else you like. We're boring and just do salt. ;)
This is shared at Frugally Sustainable's Frugal Days, Sustainable Ways. Hop on over and check out the hundred plus other awesome bloggers who've shared cool stuff about homesteading, frugal living and real food cooking!
Once you make it, you may never go back to microwaved popcorn. (At least I hope so. That stuff is NOT very good for you.)
If you've ever had old fashioned, stove popped popcorn you know that it is delicious and fluffy and devoid of all of the chemical "butter" you find in microwave popcorn or that gargantuan tub of heart-attack causing movie theater popcorn.
I remember as a kid my mom making huge amounts of popcorn and then we'd salt and butter it and pour it into a paper grocery bag to take to my uncle's football games in the fall. It would be cold and windy and more often than not it would be rainy but with warm woolen blankets and salty, delicious popcorn it was well worth it to sit for a few hours and watch him play until our fingers got numb and our noses got red and my brother and I nearly fell asleep, then we'd head for our nice cozy home and fall into our toasty warm beds.
I love making popcorn for our kids, and they love to help. It's so much fun for them to pick out a few yellow kernels and drop them into the sizzling oil, then when it pops they make a game out of trying to catch the kernels as they pop out, sometimes onto the kitchen floor. ;)
Here's how we make our stove-top popcorn: it's super easy, I don't even measure!
You need:
~A big pot with a lid, preferably a heavy-bottomed one so that the heat is distributed evenly across the pan.
~Oil of some kind. I usually use olive oil because it's healthier than canola and gives the popcorn a nicer flavor.
~Popcorn, of course! If you can, get the organic kind because the regular kind is almost certainly genetically modified. We go back and forth between organic and regular, depending on how much money we have that month.
~Salt or topping of your choice
~A big bowl
The How To:
Put your pan on the stove, turn it up to the highest heat setting and pour enough oil in to cover the bottom of the pan.
Take two or three or four kernels and drop them into the pan. This is a good place for your kids to help, because the oil isn't hot enough yet to burn them.
Leave the lid off, and wait for those kernels to pop.
When they pop, your oil is hot!
Dump in enough popcorn to cover the bottom of the pan, put the lid on (quickly!) and let them pop away!
Shake the pan back and forth on the burner a few times, so that the popped popcorn doesn't burn while the rest of the kernels are still popping.
When the popping slows down to just a few pops here and there (or when you smell it starting to burn!), turn off the heat and leave the lid on for a few more seconds to give those last few kernels a chance to pop and then pour your nice hot popcorn into a big bowl and salt it up and enjoy!
We don't use butter on our popcorn, with the olive oil you don't really have to. It leaves the popcorn nice and flavorful without the extra saturated fat that butter gives you.
You can sprinkle other toppings on as well, like nutritional yeast for a healthy but cheesy flavor, or cinnamon and sugar for a "dessert" popcorn or whatever else you like. We're boring and just do salt. ;)
This is shared at Frugally Sustainable's Frugal Days, Sustainable Ways. Hop on over and check out the hundred plus other awesome bloggers who've shared cool stuff about homesteading, frugal living and real food cooking!
Thursday, June 14, 2012
Grilled Pizza Recipe
Last night we made grilled pizza for dinner and let me tell you, it was delicious.
We were graciously given a grill a few weeks ago and we've really been enjoying experimenting with different recipes and just getting used to cooking on it, since you cook differently on a charcoal grill as opposed to a gas stove.
I LOVE it though, it's so fast and doesn't heat up the house...we are going to be using it a lot this summer, I think.
Have you ever had grilled pizza?
I hadn't before we got our grill.
It's really not too hard to make, and now that we've kind of gotten the hang of how to make it, I thought I'd share the recipe/method with you! It took us a few tries to get it right, the first pizzas looked kind of rough. But we've made grilled pizza three times now and each time it's gotten prettier. They still taste amazing, even if they look kind of rough the first time around. ;)
Grilled Pizza
You need:
A grill
Charcoal and/or hickory chunks (unless of course, you have a gas grill)
pizza pan or pizza peel
Pizza Dough (look here for a recipe)
All of the normal pizza fixin's like:
Pizza Sauce
Cheese (we used fresh Mozzarella for one pizza, packaged shredded Mozzerella, Asiago and Romano on the others.)
Or whatever you usually put on your pizza.
I pre-made pizza dough last week and froze it, then let it thaw on these plates.
We did four pizzas since we were cooking for our church small group.
Get your grill going, and let it heat up til it's nice and hot.
If you're using hickory chunks for extra flavor, soak them in some water before you light your grill so they'll smoke a bit and not burn up right away.
Meanwhile, shape out your dough into a pizza , make sure it's not sticky at all- use lots of flour.
Get a pizza pan and spray it with pan spray, then slide the dough onto the pan to transport it outside to the grill. This also coats the bottom of the pizza with spray so it doesn't stick to the grill. You can also brush olive oil on the grill, but we don't currently have a brush to do that with, so we just use pan spray. Works fine.
When the grill is hot, put the pizza (still on the pan) onto the grill for a few minutes. This helps the dough not stick to the grates when you put it on the grill.
After a sort of skin has formed on the bottom of the dough, slide it carefully onto the grill. You'll probably need to arrange it and shape in on the grate. If you get a hole on it, just do your best to patch it up.
Let it cook for 2 or 3 minutes, until it's slightly crispy on the bottom.
Take it off of the grill, put it on the pizza pan and flip it over so the grilled part is facing up. Then bring it inside to put toppings on.
Spread your sauce around on the grilled side, then put on your toppings.
We made a veggie pizza with fresh Mozzarella, spinach, onions and mushrooms,
a pizza with Italian sausage and peppers,
a pepperoni pizza, and a cheese one.
Bring the pizza back outside, and grill directly on the grill grates for 4-5 minutes with the lid closed, til the cheese is melty and the bottom of the pizza is crisp. The toppings don't cook as much as they would in a regular oven but the delicious crust makes up for the lack of crispy toppings. You can always pre-grill or pre-cook the toppings (especially if you're doing like a veggie pizza) if you want. We sauteed mushrooms beforehand on the stove and they were delicious.
Bring the pizza inside when it's done, cut it and eat!
Now that you know how to make grilled pizza, try it out and make some for your friends. They'll love it! :)
We were graciously given a grill a few weeks ago and we've really been enjoying experimenting with different recipes and just getting used to cooking on it, since you cook differently on a charcoal grill as opposed to a gas stove.
I LOVE it though, it's so fast and doesn't heat up the house...we are going to be using it a lot this summer, I think.
Have you ever had grilled pizza?
I hadn't before we got our grill.
It's really not too hard to make, and now that we've kind of gotten the hang of how to make it, I thought I'd share the recipe/method with you! It took us a few tries to get it right, the first pizzas looked kind of rough. But we've made grilled pizza three times now and each time it's gotten prettier. They still taste amazing, even if they look kind of rough the first time around. ;)
Grilled Pizza
You need:
A grill
Charcoal and/or hickory chunks (unless of course, you have a gas grill)
pizza pan or pizza peel
Pizza Dough (look here for a recipe)
All of the normal pizza fixin's like:
Pizza Sauce
Cheese (we used fresh Mozzarella for one pizza, packaged shredded Mozzerella, Asiago and Romano on the others.)
| Italian Sausage, Sauteed Mushrooms and Fresh Mozzarella |
| Red onions, Spinach, Orange Pepper and Pepperoni |
Or whatever you usually put on your pizza.
I pre-made pizza dough last week and froze it, then let it thaw on these plates.
We did four pizzas since we were cooking for our church small group.
Get your grill going, and let it heat up til it's nice and hot.
If you're using hickory chunks for extra flavor, soak them in some water before you light your grill so they'll smoke a bit and not burn up right away.
Meanwhile, shape out your dough into a pizza , make sure it's not sticky at all- use lots of flour.
| Hubby, shaping the dough out. I love that he loves to cook too! |
Get a pizza pan and spray it with pan spray, then slide the dough onto the pan to transport it outside to the grill. This also coats the bottom of the pizza with spray so it doesn't stick to the grill. You can also brush olive oil on the grill, but we don't currently have a brush to do that with, so we just use pan spray. Works fine.
When the grill is hot, put the pizza (still on the pan) onto the grill for a few minutes. This helps the dough not stick to the grates when you put it on the grill.
After a sort of skin has formed on the bottom of the dough, slide it carefully onto the grill. You'll probably need to arrange it and shape in on the grate. If you get a hole on it, just do your best to patch it up.
Let it cook for 2 or 3 minutes, until it's slightly crispy on the bottom.
Take it off of the grill, put it on the pizza pan and flip it over so the grilled part is facing up. Then bring it inside to put toppings on.
| Don't they look pretty! |
Spread your sauce around on the grilled side, then put on your toppings.
We made a veggie pizza with fresh Mozzarella, spinach, onions and mushrooms,
a pizza with Italian sausage and peppers,
a pepperoni pizza, and a cheese one.
| Here is the pepperoni pizza, just before hubby slid it onto the grill. |
Bring the pizza back outside, and grill directly on the grill grates for 4-5 minutes with the lid closed, til the cheese is melty and the bottom of the pizza is crisp. The toppings don't cook as much as they would in a regular oven but the delicious crust makes up for the lack of crispy toppings. You can always pre-grill or pre-cook the toppings (especially if you're doing like a veggie pizza) if you want. We sauteed mushrooms beforehand on the stove and they were delicious.
Bring the pizza inside when it's done, cut it and eat!
Now that you know how to make grilled pizza, try it out and make some for your friends. They'll love it! :)
Saturday, May 26, 2012
Natural Body Care Series: Avocado Lemon Hair Conditioner
Hi!
Ready for the second installment of my Natural Body Care Series?
Last time I showed you how to make Homemade Body Wash.
This time we'll be making:
I got the idea for it from this blog, but when I went to the website I didn't actually have any of the ingredients for a whole recipe of any of the conditioners. (There are like 10 recipes or something, if you need more conditioner ideas.)
So...
I just combined a few of them into my own recipe!
AND
It's
Wonderful.
Simply take:
Half an avocado (Or double the recipe and use a whole one)
Juice from half a lemon (make sure you don't skip this or your avocado will turn black and yucky.)
2 Tbsp olive oil or herb-infused oil (I used olive oil infused with lavender)
Put them all in a blender, blend til smooth.
Try not to eat it.
( I might have tasted it. It might have been good. You could add some garlic and salt and have guacamole! )
When using the conditioner, you can either use it like regular conditioner-work it into your hair while taking a shower and leave it in for a few minutes, then rinse as usual.
OR, if you want more of a deep conditioning, leave it in your hair for 20 minutes with a shower cap over your head before you take a shower, then rinse it out and shampoo your hair as usual. Either way is fine.
Side Note:
Because there is lemon juice in this recipe, if you have dark hair it may lighten it up just a tad. But there isn't
that much lemon juice, so you might be fine. Just be aware that it might. I don't know if it does or not, I haven't noticed any change.
ALSO: Keep this in the fridge in a covered container when you're not using it to keep it from going bad.
Make sure to label it so no one eats it, thinking it's guacamole! Although if they do, since it's all food-based, you don't have to worry about them getting sick or anything. ;)
It keeps for at least a week.
Update: I found it is better for me if I use the conditioner before I wash my hair with shampoo.
If I shampoo first, then use the conditioner my hair comes out way too oily, but if I use a little bit of the conditioner first, then shampoo my hair is nice and wavy and not too frizzy afterwards.
Of course, depending on your hair texture it may work better another way for you.
My hair is impossibly thick, wavy and tends to be frizzy.
Other Uses:
You can also use this as a face mask!
I tried it and my face felt so clean and moisturized afterwards.
I also took pictures but you couldn't really tell I had anything on my face, so you don't get to see any pictures. ;)
They are just of me making funny faces.
Okay, here's one- now that you're curious.
I hope you enjoy this recipe!
Have you ever made your own conditioner? I'd love to hear about it!
This post is shared at Natural Mother's Network Seasonal Celebration and Frugally Sustainable's
Frugal Days, Sustainable Ways. There are lots of cool natural tips and remedies at both places, so go check them out!
Ready for the second installment of my Natural Body Care Series?
Last time I showed you how to make Homemade Body Wash.
This time we'll be making:
Avocado Lemon Hair Conditioner
I got the idea for it from this blog, but when I went to the website I didn't actually have any of the ingredients for a whole recipe of any of the conditioners. (There are like 10 recipes or something, if you need more conditioner ideas.)
So...
I just combined a few of them into my own recipe!
AND
It's
Wonderful.
Simply take:
Half an avocado (Or double the recipe and use a whole one)
Juice from half a lemon (make sure you don't skip this or your avocado will turn black and yucky.)
2 Tbsp olive oil or herb-infused oil (I used olive oil infused with lavender)
| (My avocado looks a little weird because it's been frozen and thawed.) |
Put them all in a blender, blend til smooth.
Try not to eat it.
( I might have tasted it. It might have been good. You could add some garlic and salt and have guacamole! )
When using the conditioner, you can either use it like regular conditioner-work it into your hair while taking a shower and leave it in for a few minutes, then rinse as usual.
OR, if you want more of a deep conditioning, leave it in your hair for 20 minutes with a shower cap over your head before you take a shower, then rinse it out and shampoo your hair as usual. Either way is fine.
Side Note:
Because there is lemon juice in this recipe, if you have dark hair it may lighten it up just a tad. But there isn't
that much lemon juice, so you might be fine. Just be aware that it might. I don't know if it does or not, I haven't noticed any change.
ALSO: Keep this in the fridge in a covered container when you're not using it to keep it from going bad.
Make sure to label it so no one eats it, thinking it's guacamole! Although if they do, since it's all food-based, you don't have to worry about them getting sick or anything. ;)
It keeps for at least a week.
Update: I found it is better for me if I use the conditioner before I wash my hair with shampoo.
If I shampoo first, then use the conditioner my hair comes out way too oily, but if I use a little bit of the conditioner first, then shampoo my hair is nice and wavy and not too frizzy afterwards.
Of course, depending on your hair texture it may work better another way for you.
My hair is impossibly thick, wavy and tends to be frizzy.
Other Uses:
You can also use this as a face mask!
I tried it and my face felt so clean and moisturized afterwards.
I also took pictures but you couldn't really tell I had anything on my face, so you don't get to see any pictures. ;)
They are just of me making funny faces.
Okay, here's one- now that you're curious.
| See? You can't even tell I have this stuff on my face. I was kinda disappointed. |
I hope you enjoy this recipe!
Have you ever made your own conditioner? I'd love to hear about it!
This post is shared at Natural Mother's Network Seasonal Celebration and Frugally Sustainable's
Frugal Days, Sustainable Ways. There are lots of cool natural tips and remedies at both places, so go check them out!
Monday, March 5, 2012
Pizza Crust Recipe
Have you ever made pizza at home, only to find out that the recipe you used for crust wasn't what you expected?
I know I have. It's so disappointing to bite into that yummy-looking slice of cheesy goodness and find that the crust is either too doughy or so hard that you feel like you might break a tooth.
Believe me, I've done that many times!
Or, maybe you have never made a homemade pizza crust and always buy store-bought ones but have been wanting to try your hand at making your own?
(that was me a couple years ago, for sure!)
Today I'm going to share with you all one of my favorite pizza crust recipes. Actually, it's the only one I use anymore. It seems to be consistent at turning out just right- not too doughy, not brittle or rock-hard. I've made both thin and thick crust pizza with it and it does well with both.
I found this crust recipe on allrecipes.com.
(they're not paying me to talk about them, but they do usually have great recipes on their site.)
You do have to make this a bit in advance as it takes an hour to rise; so keep that in mind.
But if you plan ahead, you can have delicious, homemade pizza crust for a fraction of the store-bought variety. It's healthier by a mile and a half and I think it tastes better too.
Here is the link to the original recipe.
These are my words but the original measurements, general instructions, etc.
Jay's Signature Pizza Crust
Makes 2 pizza crusts
Mix 2 1/4 tsp dry active yeast (1 packet) and 1/2 tsp sugar into 1 1/2 cups warm (110-115F) water, let sit til bubbly and fermented smelling. (about 2 min.)
Stir 1 tsp salt, 3 1/3 cups of whole wheat flour together in a large mixing bowl.
Add 2Tbsp olive oil and water/yeast/sugar mixture to flour.
Stir stir stir, till most of the flour is worked into the dough.
On a floured surface, knead dough til it is no longer sticky and is smooth and supple, adding more flour as needed.
Return to the bowl, cover with a towel and let rise in a warm place for 1 hour, til dough is doubled in size.
Punch down your dough.
If you want your kids to help out, now is a good time for them to.
They love punching their little fists into the dough!
Allow dough to rest for a minute.
Divide dough in half, roll to desired shape and thickness on a pizza pan or stone.
(Someday, I will have a pizza stone. Or a few of them.)
Top with sauce, spices and your favorite pizza toppings.
As far as spices go, use whatever you normally use.
I sprinkle basil, a bit of oregano, parsley, garlic powder, and sometimes pepper on there.
Some of our favorite pizza toppings are:
Pepperoni (we use uncured, nitrate and hormone-free pepperoni and seriously it is sooooo good!)
Onions and Sweet Peppers
Turkey or ham and pineapple
Roast beef and Swiss cheese (sounds weird, is really good!)
Feta, Parmesan and Spinach
Get creative and use whatever you have in the fridge. It's fun to try new combinations of toppings and come up with something delicious!
Once you've got your pizzas all ready to go, bake them in a preheated, 425F oven for 15-25 min, or until the bottom is crispy and your cheese is all ooey-gooey and bubbly. Enjoy!!
*Note: if you want your pizza crust to be extra crispy, add cornmeal instead of flour as you are kneading the dough. This gives it a lot more crunch and a nice crispy crust. Then, just make sure to roll out the crust nice and thin and you've got yourself a crunchy delectable pizza.
This post is shared at Mind Body and Sole's Wildcrafting Wednesday.
I know I have. It's so disappointing to bite into that yummy-looking slice of cheesy goodness and find that the crust is either too doughy or so hard that you feel like you might break a tooth.
Believe me, I've done that many times!
Or, maybe you have never made a homemade pizza crust and always buy store-bought ones but have been wanting to try your hand at making your own?
(that was me a couple years ago, for sure!)
Today I'm going to share with you all one of my favorite pizza crust recipes. Actually, it's the only one I use anymore. It seems to be consistent at turning out just right- not too doughy, not brittle or rock-hard. I've made both thin and thick crust pizza with it and it does well with both.
I found this crust recipe on allrecipes.com.
(they're not paying me to talk about them, but they do usually have great recipes on their site.)
You do have to make this a bit in advance as it takes an hour to rise; so keep that in mind.
But if you plan ahead, you can have delicious, homemade pizza crust for a fraction of the store-bought variety. It's healthier by a mile and a half and I think it tastes better too.
Here is the link to the original recipe.
These are my words but the original measurements, general instructions, etc.
Jay's Signature Pizza Crust
Makes 2 pizza crusts
Mix 2 1/4 tsp dry active yeast (1 packet) and 1/2 tsp sugar into 1 1/2 cups warm (110-115F) water, let sit til bubbly and fermented smelling. (about 2 min.)
| When you first add the yeast this is what it will look like. |
| Then you let it sit, and it looks like this. It kind of looks like little explosions going off in the water. The kids love to watch this part. :) |
Stir 1 tsp salt, 3 1/3 cups of whole wheat flour together in a large mixing bowl.
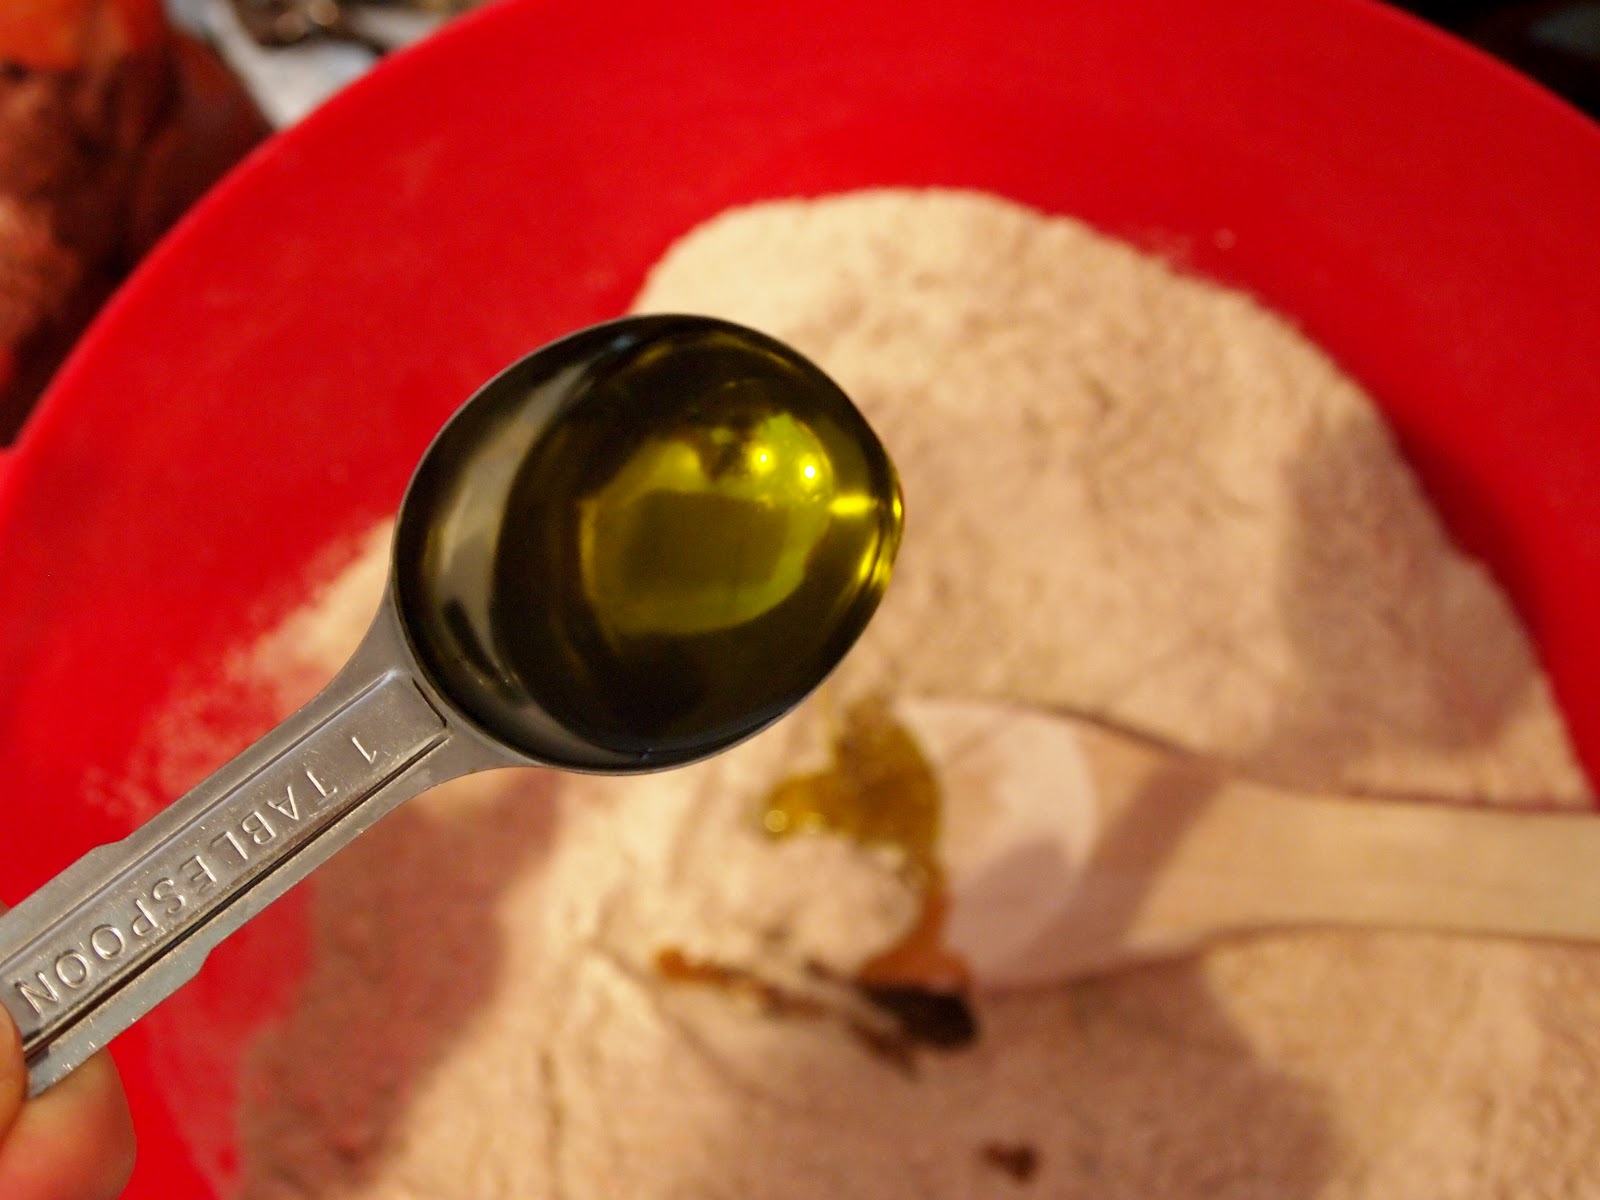
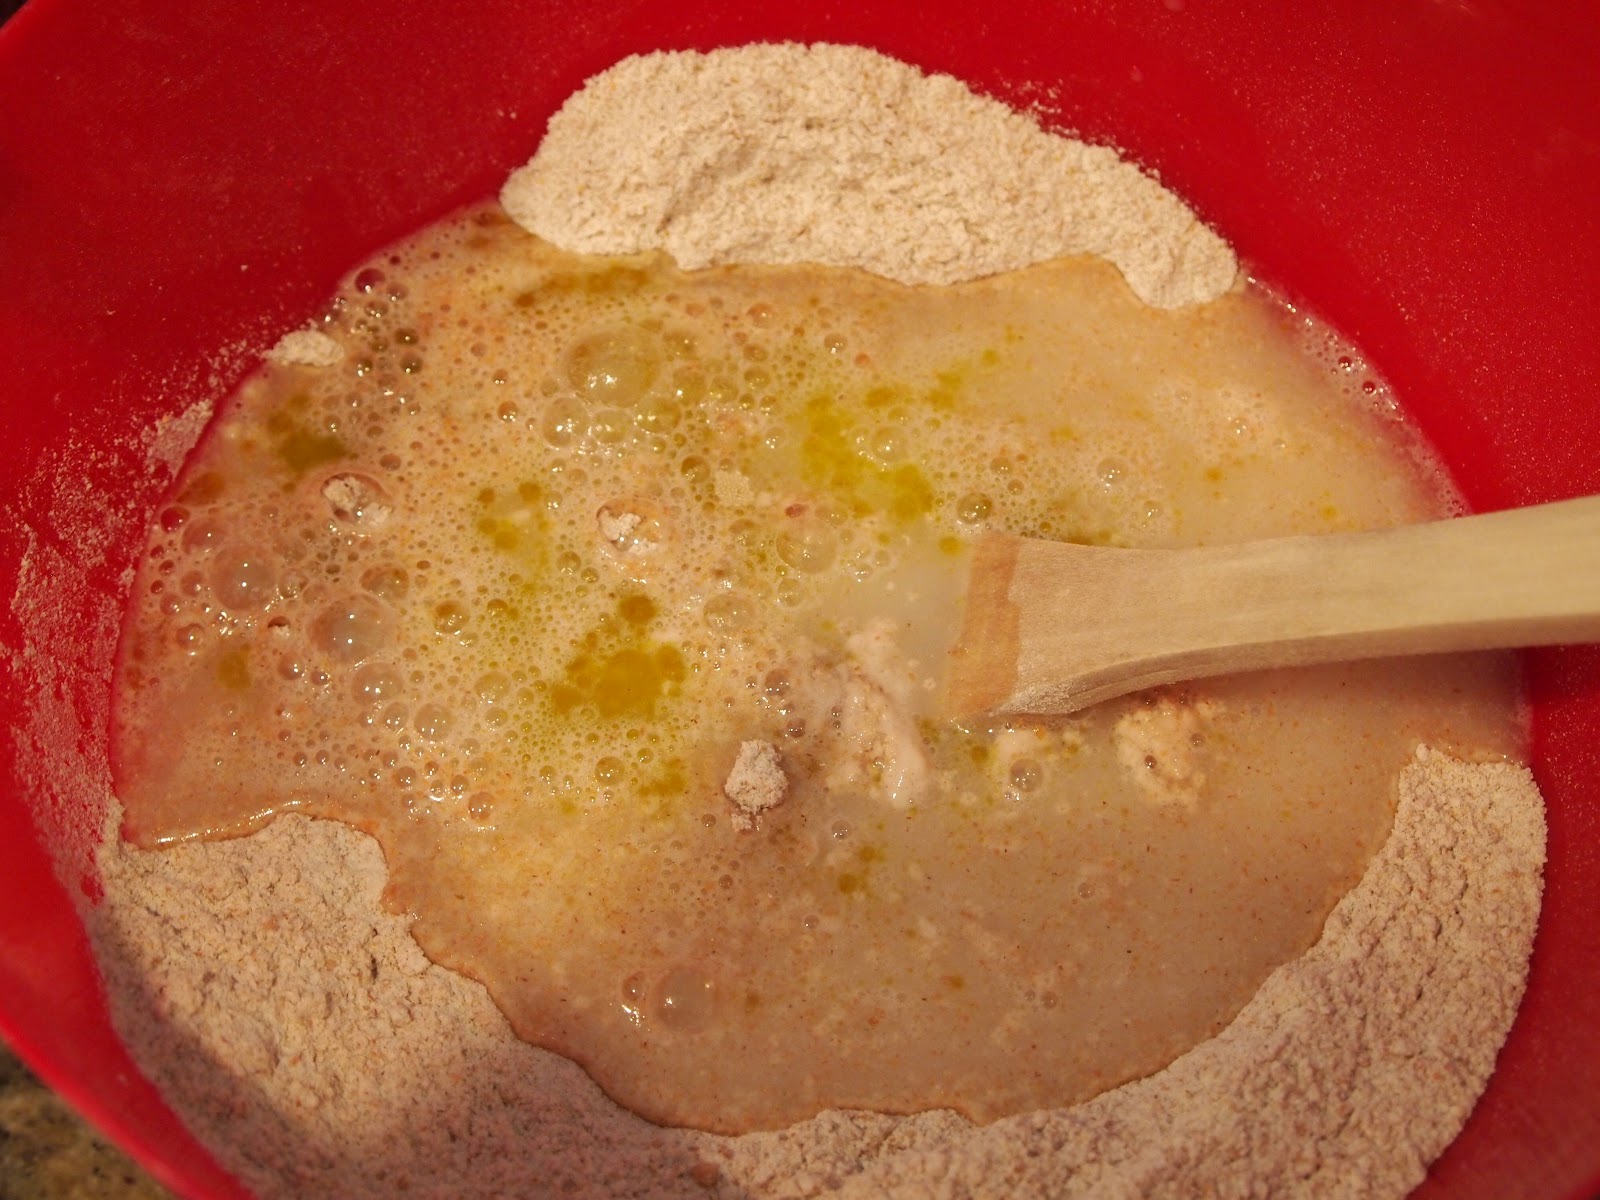
Add 2Tbsp olive oil and water/yeast/sugar mixture to flour.
Stir stir stir, till most of the flour is worked into the dough.
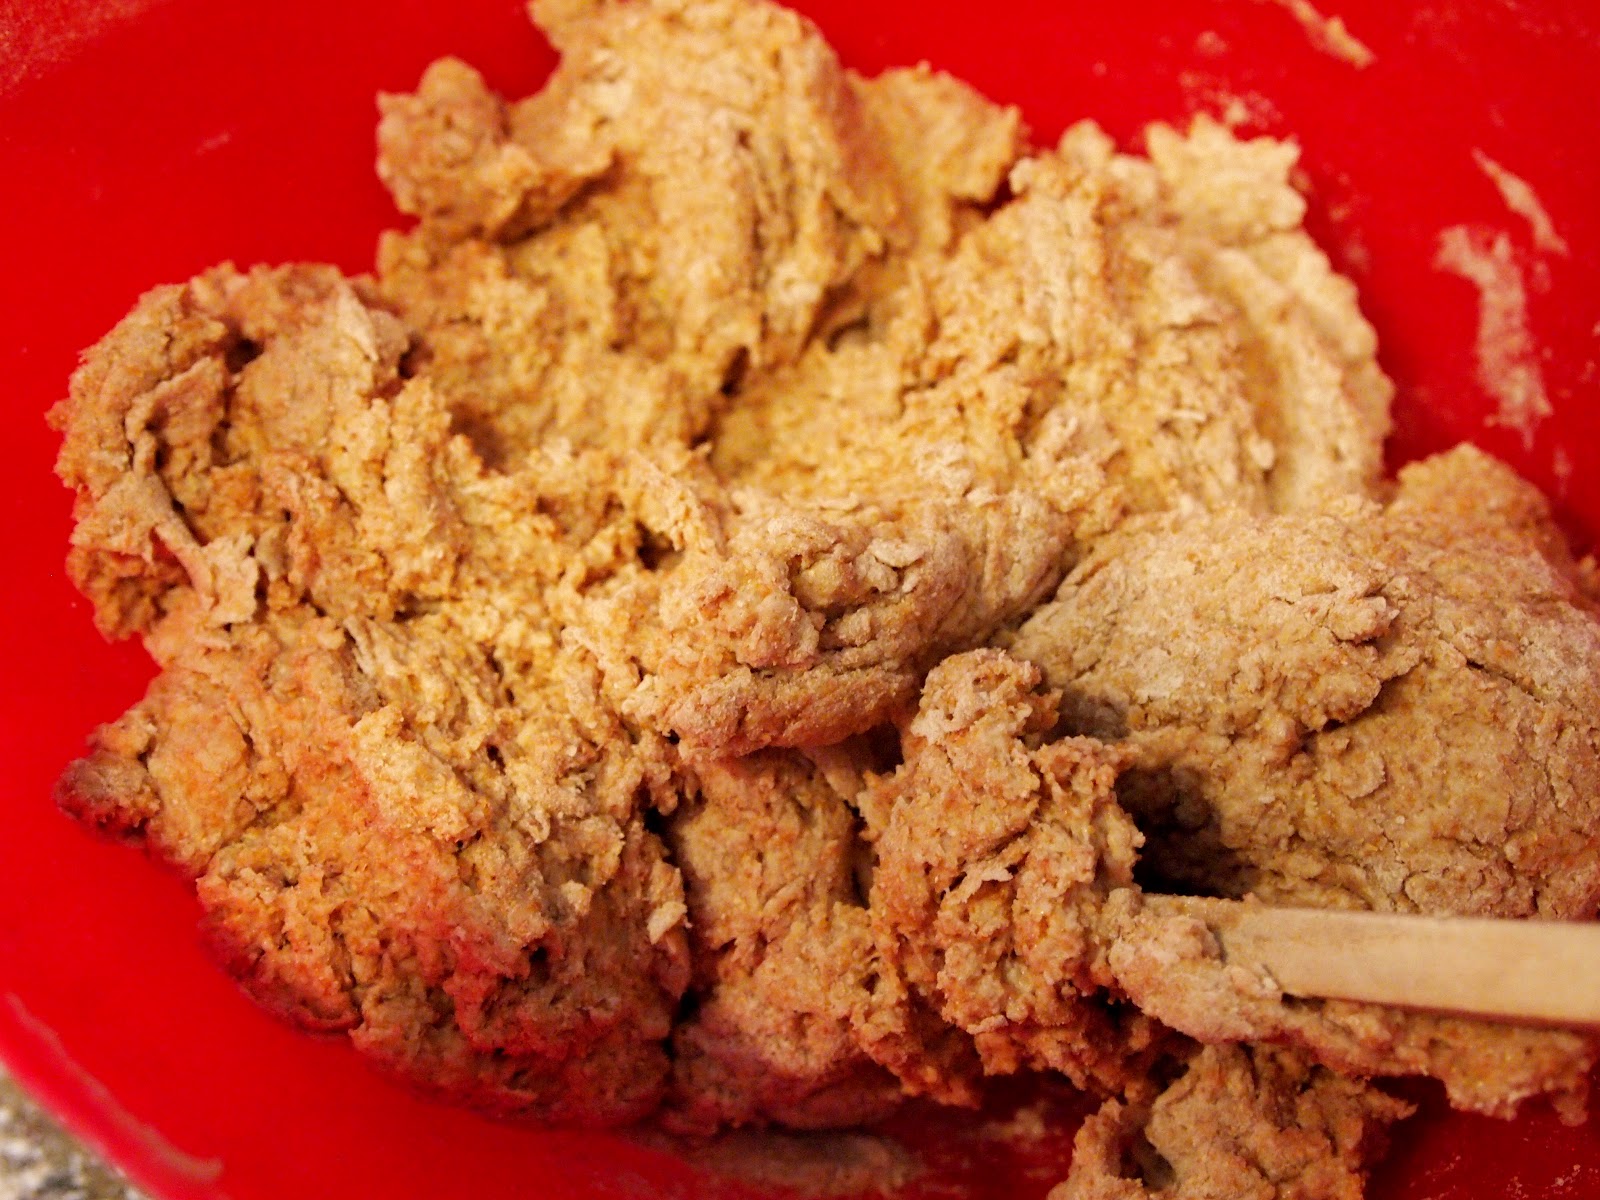
| Your dough will look something like this. |
On a floured surface, knead dough til it is no longer sticky and is smooth and supple, adding more flour as needed.
| The dough starts out looking like this...raggedy and sticky. |
| And ends up looking like this beauty. I just want to eat it up! |
Return to the bowl, cover with a towel and let rise in a warm place for 1 hour, til dough is doubled in size.
| It's kind of hard to tell, but it's all puffy and conformed to the bowl shape now rather than being a nice ball of dough like it was in the last picture. |
Punch down your dough.
If you want your kids to help out, now is a good time for them to.
They love punching their little fists into the dough!
Allow dough to rest for a minute.
Divide dough in half, roll to desired shape and thickness on a pizza pan or stone.
(Someday, I will have a pizza stone. Or a few of them.)
Top with sauce, spices and your favorite pizza toppings.
As far as spices go, use whatever you normally use.
I sprinkle basil, a bit of oregano, parsley, garlic powder, and sometimes pepper on there.
Some of our favorite pizza toppings are:
Pepperoni (we use uncured, nitrate and hormone-free pepperoni and seriously it is sooooo good!)
Onions and Sweet Peppers
Turkey or ham and pineapple
Roast beef and Swiss cheese (sounds weird, is really good!)
Feta, Parmesan and Spinach
Get creative and use whatever you have in the fridge. It's fun to try new combinations of toppings and come up with something delicious!
Once you've got your pizzas all ready to go, bake them in a preheated, 425F oven for 15-25 min, or until the bottom is crispy and your cheese is all ooey-gooey and bubbly. Enjoy!!
| Roast Beef and Swiss Pizza |
| Pepperoni |
*Note: if you want your pizza crust to be extra crispy, add cornmeal instead of flour as you are kneading the dough. This gives it a lot more crunch and a nice crispy crust. Then, just make sure to roll out the crust nice and thin and you've got yourself a crunchy delectable pizza.
This post is shared at Mind Body and Sole's Wildcrafting Wednesday.
Friday, February 24, 2012
Food Waste Friday...I almost made it..and a recipe.
Hello!
It's...

I was so excited this morning to write this post up because I thought that I had no food waste this week.
But then....
I started putting food in the crockpot for dinner and found this little present inside a potato.
Boo.
At least it wasn't my fault; and it went into the compost.
So not too bad!
Here is how I used up the leftovers in the fridge that were threatening to become waste:
Using Up Leftovers: Beef AuJus Stew
Last week, I made Crockpot Beef French Dip with Swiss sandwiches (recipe here)
and had some meat left over.
We used a tiny bit of the meat on homemade pizza and put swiss on the pizza as well. It was hubby's idea and I must admit, it sounded a little weird to me. But I decided to try it, and it was SO good!
Then, this morning I decided to make a stew out of the rest of the leftover meat and au jus.
If you have leftover beef in the house, here's an easy way to use it up:
You need:
~A crockpot (or you could just cook it on the stove, but a crockpot is nice because you don't have to babysit it, you just stick everything in there and leave it alone all day)
~Leftover beef
~Beef broth
~Vegetables - Use whatever you have that needs to be used up. For me, this was some carrot sticks that we'd brought in the car a few days ago and not eaten, plus another half that the kids were snacking on and didn't finish, (just cut off the part with the bite on it) and another whole carrot, a huge potato (which I only used half of since the other half decided to contribute to FWF) and some celery that was getting a bit wilty.
I also used half an onion, and a bit of cilantro.
~Garlic, Rosemary, Basil, Parsely, Thyme and whatever spices you desire.
Basically, put the leftover beef and aujus or broth in the crockpot.
Add some fresh (or dried) rosemary. I used fresh, since hubby brought this home yesterday:
I don't measure the spices, I just use a bit until it looks like enough.
Cut up your veggies.
Throw them in, add enough broth to cover, add spices, stir. Put on lid, turn crockpot on low (remember your meat is already cooked so you're just cooking the veggies) and let it cook for 4 or more hours.
Devour when it's done. :)
Hubby has to work a double shift today at work, so he'll be home around 3:30 and this will be ready for him to eat before he has to go back to work. Then the kids and I can eat it at dinner time, when we get hungry. I love crockpots!!
How did you do on your food waste this week?
Did you come up with any creative ways to use up leftovers? I'd love to hear them!
This post is shared at The Frugal Girl, who is the brains behind all of this food waste documentation.
It's...
I was so excited this morning to write this post up because I thought that I had no food waste this week.
But then....
I started putting food in the crockpot for dinner and found this little present inside a potato.
Boo.
At least it wasn't my fault; and it went into the compost.
So not too bad!
Here is how I used up the leftovers in the fridge that were threatening to become waste:
Using Up Leftovers: Beef AuJus Stew
Last week, I made Crockpot Beef French Dip with Swiss sandwiches (recipe here)
and had some meat left over.
We used a tiny bit of the meat on homemade pizza and put swiss on the pizza as well. It was hubby's idea and I must admit, it sounded a little weird to me. But I decided to try it, and it was SO good!
Then, this morning I decided to make a stew out of the rest of the leftover meat and au jus.
If you have leftover beef in the house, here's an easy way to use it up:
You need:
~A crockpot (or you could just cook it on the stove, but a crockpot is nice because you don't have to babysit it, you just stick everything in there and leave it alone all day)
~Leftover beef
~Beef broth
~Vegetables - Use whatever you have that needs to be used up. For me, this was some carrot sticks that we'd brought in the car a few days ago and not eaten, plus another half that the kids were snacking on and didn't finish, (just cut off the part with the bite on it) and another whole carrot, a huge potato (which I only used half of since the other half decided to contribute to FWF) and some celery that was getting a bit wilty.
I also used half an onion, and a bit of cilantro.
~Garlic, Rosemary, Basil, Parsely, Thyme and whatever spices you desire.
Basically, put the leftover beef and aujus or broth in the crockpot.
Add some fresh (or dried) rosemary. I used fresh, since hubby brought this home yesterday:
| I'm so excited to dry this and use it for the next...oh probably year or two. ;) |
I don't measure the spices, I just use a bit until it looks like enough.
Cut up your veggies.
Throw them in, add enough broth to cover, add spices, stir. Put on lid, turn crockpot on low (remember your meat is already cooked so you're just cooking the veggies) and let it cook for 4 or more hours.
Devour when it's done. :)
Hubby has to work a double shift today at work, so he'll be home around 3:30 and this will be ready for him to eat before he has to go back to work. Then the kids and I can eat it at dinner time, when we get hungry. I love crockpots!!
How did you do on your food waste this week?
Did you come up with any creative ways to use up leftovers? I'd love to hear them!
This post is shared at The Frugal Girl, who is the brains behind all of this food waste documentation.
Wednesday, February 15, 2012
Herbal Remedy: Rosemary Tea for Headaches
I read somewhere recently that the common herb Rosemary is useful for relieving headaches of all kinds.
Being the type of person who would rather try an herbal remedy than take Excedrin or some other drug to relieve pain, I decided to give it a try.
I've never really used Rosemary for anything other than cooking chicken with, or maybe in a soup or two, so I had a nice big jar sitting in my spice cabinet, waiting to be used.
*Disclaimer*
Using herbs without knowing how to do so can result in harmful side effects, so make sure you know how much to use and what to use an herb for before you make up a tincture, tea, etc. I know that Rosemary is safe to drink as tea, which is why I made it. Consult a health food store or herbalist for advice on how to use each herb properly, especially if you are pregnant or breastfeeding.
A good resource for herbal remedies and to buy herbs from is Mountain Rose Herbs.
Rosemary Tea
I used the same method to brew the rosemary as described in my honey lemon thyme tea recipe.
I just put about 1 Tablespoon of dried rosemary into a cloth napkin, put that into a nice big mug,
then poured boiling water in it from my nice bright red tea kettle.
I let it steep maybe 5 minutes, then squeezed the excess water out of the napkin and set it aside. Then I added about 1 teaspoon of local, raw honey, waited for it to cool a tiny bit and drank up.
I have to say, I think that it works!
As I sipped the tea, I could feel myself relaxing from the soothing warmth running into my body, and by the time the cup nearly was gone (when I remembered to take a picture of the tea itself..oops!), so was my headache.
I was pleasantly surprised by both the color and flavor of the tea; it was almost a lavender color (my favorite!) and the flavor was way different from when you cook it with chicken. The rosemary had a nice, herbal flavor (you know...kind of...grassy or leafy) but also had bright notes in it that would pair well with a bit of lemon. I really enjoyed drinking it, and will again in the future, probably even if I don't have a headache.
So, if you have a headache (and as a mommy I get one quite often from tension, lack of sleep or from stress) try drinking some rosemary tea before you pop that ibuprofen.
I'm not guaranteeing it will work for you, but our bodies are always more receptive to natural remedies than man-made ones.
Linking to Frugally Sustainable's Frugal Days, Sustainable Ways and Wildcrafting Wednesday at Mind Body and Sole
Being the type of person who would rather try an herbal remedy than take Excedrin or some other drug to relieve pain, I decided to give it a try.
I've never really used Rosemary for anything other than cooking chicken with, or maybe in a soup or two, so I had a nice big jar sitting in my spice cabinet, waiting to be used.
*Disclaimer*
Using herbs without knowing how to do so can result in harmful side effects, so make sure you know how much to use and what to use an herb for before you make up a tincture, tea, etc. I know that Rosemary is safe to drink as tea, which is why I made it. Consult a health food store or herbalist for advice on how to use each herb properly, especially if you are pregnant or breastfeeding.
A good resource for herbal remedies and to buy herbs from is Mountain Rose Herbs.
Rosemary Tea
I used the same method to brew the rosemary as described in my honey lemon thyme tea recipe.
I just put about 1 Tablespoon of dried rosemary into a cloth napkin, put that into a nice big mug,
then poured boiling water in it from my nice bright red tea kettle.
I let it steep maybe 5 minutes, then squeezed the excess water out of the napkin and set it aside. Then I added about 1 teaspoon of local, raw honey, waited for it to cool a tiny bit and drank up.
I have to say, I think that it works!
As I sipped the tea, I could feel myself relaxing from the soothing warmth running into my body, and by the time the cup nearly was gone (when I remembered to take a picture of the tea itself..oops!), so was my headache.
I was pleasantly surprised by both the color and flavor of the tea; it was almost a lavender color (my favorite!) and the flavor was way different from when you cook it with chicken. The rosemary had a nice, herbal flavor (you know...kind of...grassy or leafy) but also had bright notes in it that would pair well with a bit of lemon. I really enjoyed drinking it, and will again in the future, probably even if I don't have a headache.
So, if you have a headache (and as a mommy I get one quite often from tension, lack of sleep or from stress) try drinking some rosemary tea before you pop that ibuprofen.
I'm not guaranteeing it will work for you, but our bodies are always more receptive to natural remedies than man-made ones.
Linking to Frugally Sustainable's Frugal Days, Sustainable Ways and Wildcrafting Wednesday at Mind Body and Sole
Subscribe to:
Posts (Atom)