Happy Black Friday!
I hope you all had a wonderful Thanksgiving with your families and friends-
We had a delicious, fun Thanksgiving with my family and afterwards played Just Dance 2 on the Wii. Oh, my goodness, that was SO much fun!
I've been trying to make the most lately of the storage capacity of our bedroom, which takes some creativity.
The room is long and skinny (it used to be the back porch) and it fits a dresser, bed, desk and that's about it. It's really cozy and there's a window looking out to the cow field which I love!
My sewing table is right in front of the window so I can take peeks at the cows grazing lazily around in the field while I sew away.
We have kind of made the windowsill into a bookshelf/storage for art supplies/whatever else ends up there and we had paintbrushes and some other things stuck into mason jars and it looked kind of mumble-jumble.
I wanted to prettify the space, so I took some twine we got at the thrift store and wrapped it around the jars. I may have a fetish for twine. I love it!! My mom gave me the huge roll of twine, and the smaller one is from the thrift store.
Viola!!
Cute, rustic decorative jars to hold all of our odds and ends. And lavender.
It looks SO much better.
I didn't even hot glue the twine, I just tied it around the top, then wrapped the twine around tightly, working down to the bottom of the jar, then used elmer's glue to hold the other end down.
So if you have some mismatched containers holding stuff that you'd like to make look prettier, get some twine and get wrappin!
Showing posts with label DIY projects. Show all posts
Friday, November 23, 2012
Friday, September 28, 2012
$10 Bathroom Redo
Guess what I've been up to?
I brought the blue vase in from atop the piano, made a curtain out of off-white linen and added white towels for a nice, clean look that is simple yet cozy.
I'm pleased, and now I'll actually want to use it instead of walking down to the other end of the house where the nicer bathroom is. ;)
Redecorating the powder room in my parent's house!
This tiny bathroom is right in front of you when you come in the front door and is really in a handy spot...but it was....sad.
It was just plain white, with the basics in it: a towel. hand soap, a mirror, a sink and of course, a commode.
Nothing special, although it functioned just fine.
I wanted to make it pretty, because pretty things are just so much more fun, right?
I think so.
I think so.
Off to the hardware store we went!
I spent $10 on a painting tray, paintbrush and roller and when we got home, I got right to work.
My mom already had some paint left over from when they did the kitchen. It was a nice green color, but I wanted to lighten it up a bit so I added a little white paint, mixed it really well and went to town on those sad, grayish-white walls.
I forgot to take a picture of the before, but here is a dingy white wall that is very similar to what the bathroom looked like before. (This is the next bathroom on the repainting list.)
(Gold hardware!?! Ick! But I don't want to spend the time spray painting all of it, so it stays for now. This used to be my Grandma's house and she chose gold hardware for everything.)
Here is what that cute little powder room looks like now:
Nice change, huh?
I brought the blue vase in from atop the piano, made a curtain out of off-white linen and added white towels for a nice, clean look that is simple yet cozy.
I'm pleased, and now I'll actually want to use it instead of walking down to the other end of the house where the nicer bathroom is. ;)
Paint really can work miracles!
SO
SO
If you have a sad, plain room in your house, go and get some paint and transform it into something fabulous!
Monday, June 18, 2012
Our Living Room + Pallet TV Stand
Hi!
I hinted on Facebook a couple of days ago that we had made something else with pallets besides our headboard. Really we didn't make something with a pallet...we just kind of used the pallet how it was to make a television stand.
So here is a tour of our living room, with our pallet TV stand.
This is looking from the laundry room into the living room. The door with the purse on it is a closet and the front door is right to the left of it, on the wall that the couch is on.
The white rocking chair we got from a thrift store for $10 and it's one of the best buys we've ever made. It's just the right height and rocks really nicely.
We also got the side table at a thrift store, and repainted it white. It was a dark fake wood before we spray painted it with appliance epoxy.
That thing in the floor is our heater, an old gas floor furnace that works great for heating the front of the house in the winter.
The hanging chandelier is from Ikea.
A closer view of our coffee table, made from the inside back of an old piano that we found on the side of the road. The kids eat snacks at it while watching movies, and they love jumping off of it onto the floor. :)
That basket is full of library books.
So here is the pallet TV stand. This view is from right by the front door. The wooden door leads to the laundry room, which used to be a covered porch years ago before we moved in. The bookcase used to be a window.
The chair next to the bookcase we found on the side of the road, and I recovered and repainted it. (it took me a year to get around to doing it, but I finally did!)
Our couch we got from Salvation army. I love it!
The yellow pillow I made, the blue one I made a cover for and the one at the far end of the couch we bought at Garden Ridge.
I made the curtains out of an old sheet from the thrift store, and the beautiful blue hanging Moroccan lamps (candle holders) are from my dear friend Laura, who got them for us as an anniversary gift.
This view is from the far corner of the living room, near our heater and the rocking chair that you can see in the first picture.
Finally, our pallet TV stand. Tim secured it to the wall using industrial magnet strips that he got at Harbor Freight, and we screwed the tv into the top of the pallet.
Our dvd player fits just right into one of the slots on the pallet, which we love. We plan to make the cords look a bit nicer, when we get around to it. ;)
So there is our little living room!
I'm sure it'll change in a few months, because we are always moving stuff around and re-decorating, but for now, that is what it looks like. :)
Monday, June 11, 2012
Easy DIY Pallet Headboard
So, remember way back last year when we were playing around with pallets and made a pallet table?
It served it's purpose (because we didn't have a dining room table at the time) but when it was time to see it go, I was glad. It was too scratchy, and bigger than we'd planned for the space.
There are all kinds of cool pallet projects on Pinterest, and I've been wanting to make some sort of headboard for our bed- the wall just looked a little bit lonely all by itself.
So, do you want to know a SUPER easy way to make a pallet headboard?
First: drive around and find some pallets. They are everywhere, just laying out by the side of the road; near dumpsters of businesses, all over the place. We found ours in an industrial business park behind the building.
There were a whole bunch of them just waiting to be taken away by a garbage man, but we got there first.
Saturday is a good day to go pallet hunting, since most businesses are closed.
(side note: If there is anyone around, it's a good idea to ask if it's okay to take the pallets so you don't get in trouble for stealing. There was a man there that hubby asked and he said "go ahead!", so we did!)
We picked the pallets in the nicest condition and brought 6 of them home.
Next: make sure your pallets don't have any spiders on them and wipe them down to get the dirt off.
You don't want any "surprise visitors" when you're sleeping! (eek!)
Thirdly: Take your bed apart or scoot it away from the wall.
Fourthly: Stand two pallets up next to each other and scoot your bed up against them. You may need to raise the pallets up off the ground, or lower your bed to get the right height for your headboard.
We decided to take the ugly metal bed frame off the bed and place the box spring and mattress on a few pallets to lower the bed enough to get the look we wanted. So now we have a platform bed with a cool headboard.
Then make your bed all pretty, stand back and admire it!
I LOVE how this turned out, and it seriously took like 15 minutes.
You don't even have to have skills to do this, other than some strong arms to muscle the pallets around.
Hubby did all of that, I just made suggestions and got some homemade granola cooking in the oven. ;)
I also have one more easy pallet project to share with you, but it's not quite done yet, so stay tuned!
This post is shared at Natural Mother's Network, Seasonal Celebration.
It served it's purpose (because we didn't have a dining room table at the time) but when it was time to see it go, I was glad. It was too scratchy, and bigger than we'd planned for the space.
There are all kinds of cool pallet projects on Pinterest, and I've been wanting to make some sort of headboard for our bed- the wall just looked a little bit lonely all by itself.
So, do you want to know a SUPER easy way to make a pallet headboard?
First: drive around and find some pallets. They are everywhere, just laying out by the side of the road; near dumpsters of businesses, all over the place. We found ours in an industrial business park behind the building.
There were a whole bunch of them just waiting to be taken away by a garbage man, but we got there first.
Saturday is a good day to go pallet hunting, since most businesses are closed.
(side note: If there is anyone around, it's a good idea to ask if it's okay to take the pallets so you don't get in trouble for stealing. There was a man there that hubby asked and he said "go ahead!", so we did!)
We picked the pallets in the nicest condition and brought 6 of them home.
Next: make sure your pallets don't have any spiders on them and wipe them down to get the dirt off.
You don't want any "surprise visitors" when you're sleeping! (eek!)
Thirdly: Take your bed apart or scoot it away from the wall.
| We took the metal frame out from under our bed. |
Fourthly: Stand two pallets up next to each other and scoot your bed up against them. You may need to raise the pallets up off the ground, or lower your bed to get the right height for your headboard.
We decided to take the ugly metal bed frame off the bed and place the box spring and mattress on a few pallets to lower the bed enough to get the look we wanted. So now we have a platform bed with a cool headboard.
Then make your bed all pretty, stand back and admire it!
I LOVE how this turned out, and it seriously took like 15 minutes.
You don't even have to have skills to do this, other than some strong arms to muscle the pallets around.
Hubby did all of that, I just made suggestions and got some homemade granola cooking in the oven. ;)
I also have one more easy pallet project to share with you, but it's not quite done yet, so stay tuned!
This post is shared at Natural Mother's Network, Seasonal Celebration.
Wednesday, April 4, 2012
Furniture Makeovers
Hi!
So I mentioned last week that we'd gotten some furniture from the thrift store and were going to redo it...then life happened. Our computer needed to get fixed, we went on vacation and..I am just now getting to showing you those pictures.
Our family went to the Goodwill last week and honestly, I wasn't expecting much. For some reason I never have any luck finding things that I actually like at Goodwill. However, this time, we hit the jackpot!
We found:
A cute side table ($5.99)
A quirky chair with pretty vinyl fabric on it ($9.99)
A "taters and onions" bin (to store potatoes and onions in) ($4.99)
Don't you just love the sunflowers?? (not...)
And several other smaller things- some dishes, a plastic shopping cart for Ellie and a wooden stick horse for Ethan, a small stool to be used for a bedside table.
We wanted to personalize the furniture and make it fit better in our house (ie, paint it with white spray paint) because we already have a lot of dark wood and our house is small, so white really brightens up the space.
Ready??
Here is the side table now:
And the chair:
And...I haven't finished the "tater and onions bin" yet- we need to get hardware on it but let me tell you, it looks WAY better now than it did with those sunflowers on it.
Painting these and seeing how nice they look inspired us and we decided to make over our secretary desk/hutch thing as well.
It looks like a million bucks!
Here is what it looked like before: blah. Too orangey and it made the dining room feel smaller. Which it definitely does not need. It had round, wooden handles on the drawers, I had just taken them off before the picture.
Here is what it looks like afterwards....ta-da!!
Isn't it gorgeous??
The best part is, we only spent about $30 on redoing it.
4 cans of white spray paint and some new hardware and bam! A whole new hutch. I can't stop looking at it.
Then a few days after all of this painting, we got this pretty couch from the Salvation Army, which is EXACTLY the kind of sofa I wanted but didn't want to (and couldn't) pay full price for.
LOVE.
Have you found some awesome things at the thrift store lately? Do tell!
Monday, February 27, 2012
Pleated T-Shirt Pillow Tutorial
Howdy!
I'm sharing a project with you today that is fairly easy, economical and will add a little pizzazz to your house.
I think I'm becoming more and more of a pillow person as I get older. I used to not care so much about pillows but...they are growing on me.
Throw pillows are so darn cute and I just can't get enough of them!
So, I decided to make one.
I've been wanting to incorporate more of my current favorite colors (yellow and grey) into our house lately and came up with the idea of making a pillow out of a few t-shirts.
Now, if you have old t-shirts that you aren't wearing anymore, this would be a perfect way to use them up. I unfortunately did not have any that were the colors I wanted, so off to Michael's I went to buy some.
I actually ended up buying a pillow form there too instead of batting, because I tend to not be very good at stuffing pillows- they turn out really lumpy, so I splurged and just bought one that was already made.
Theoretically, if you have t-shirts AND batting this project could be completely free for you to make.
Do you want to know how to make one?
It's fairly simple, but kind of time-consuming. Just a warning up front. ;)
Those pleats take a while to pin. But other than that, it's not complicated at all!
Pleated T-Shirt Pillow
You need:
2-XL t-shirts in whatever color (s) you want.
(you'll have a bit left over for future projects but you need xl for the proper width.)
Pillow form or batting
Sewing Machine with a needle for sewing knits (ball point, or jersey needle- just look for the ones that say 'for knits')
Thread
Pins
Scissors
Measuring tape or ruler
Okay. So first, figure out what size you want your pillow to be. My pillow form said 16'x16' on the package, but when I measured it, it was actually 16 1/2 by 17. So make sure if you get a pre-made pillow form, you measure it before you make the pillow cover!
Use at least half an inch seam allowance.
I ended up cutting my fabric 17 1/2 by 18, because I tend to need a larger seam allowance since I still cannot sew in a completely straight line!
| Please excuse the lighting on some of these pictures, as the only time I had to work on the pillow was after the kidlets went to bed. :) |
Measure your fabric from just under the arms of the t-shirt all the way to the bottom, leaving the hem on the bottom of your piece of fabric. This makes it easy to fold and sew at the very end- you get a nice straight line instead of a possibly wonky bottom of your pillow.
If you want, instead of cutting out two pieces of fabric length x width, you can multiply the length by two and just cut out one long piece of fabric. This is what I did. I'm all for taking shortcuts in sewing if it doesn't really affect the outcome! In this case, it doesn't unless you want matching seams along both sides of the pillow. I don't care if they are there or not, so I did it this way.
So instead of cutting two 17 1/2'x 18 pieces of fabric, I just cut one 36' long.x 18' tall piece of fabric. (this gave me a seam allowance of an inch for that side that I'd be sewing.)
Whew! I hope that isn't confusing.
| This is the fabric, folded in half. |
Okay. So you have your fabric cut out for the main body of the pillow.
Now, for the strips that turn into ruffles.
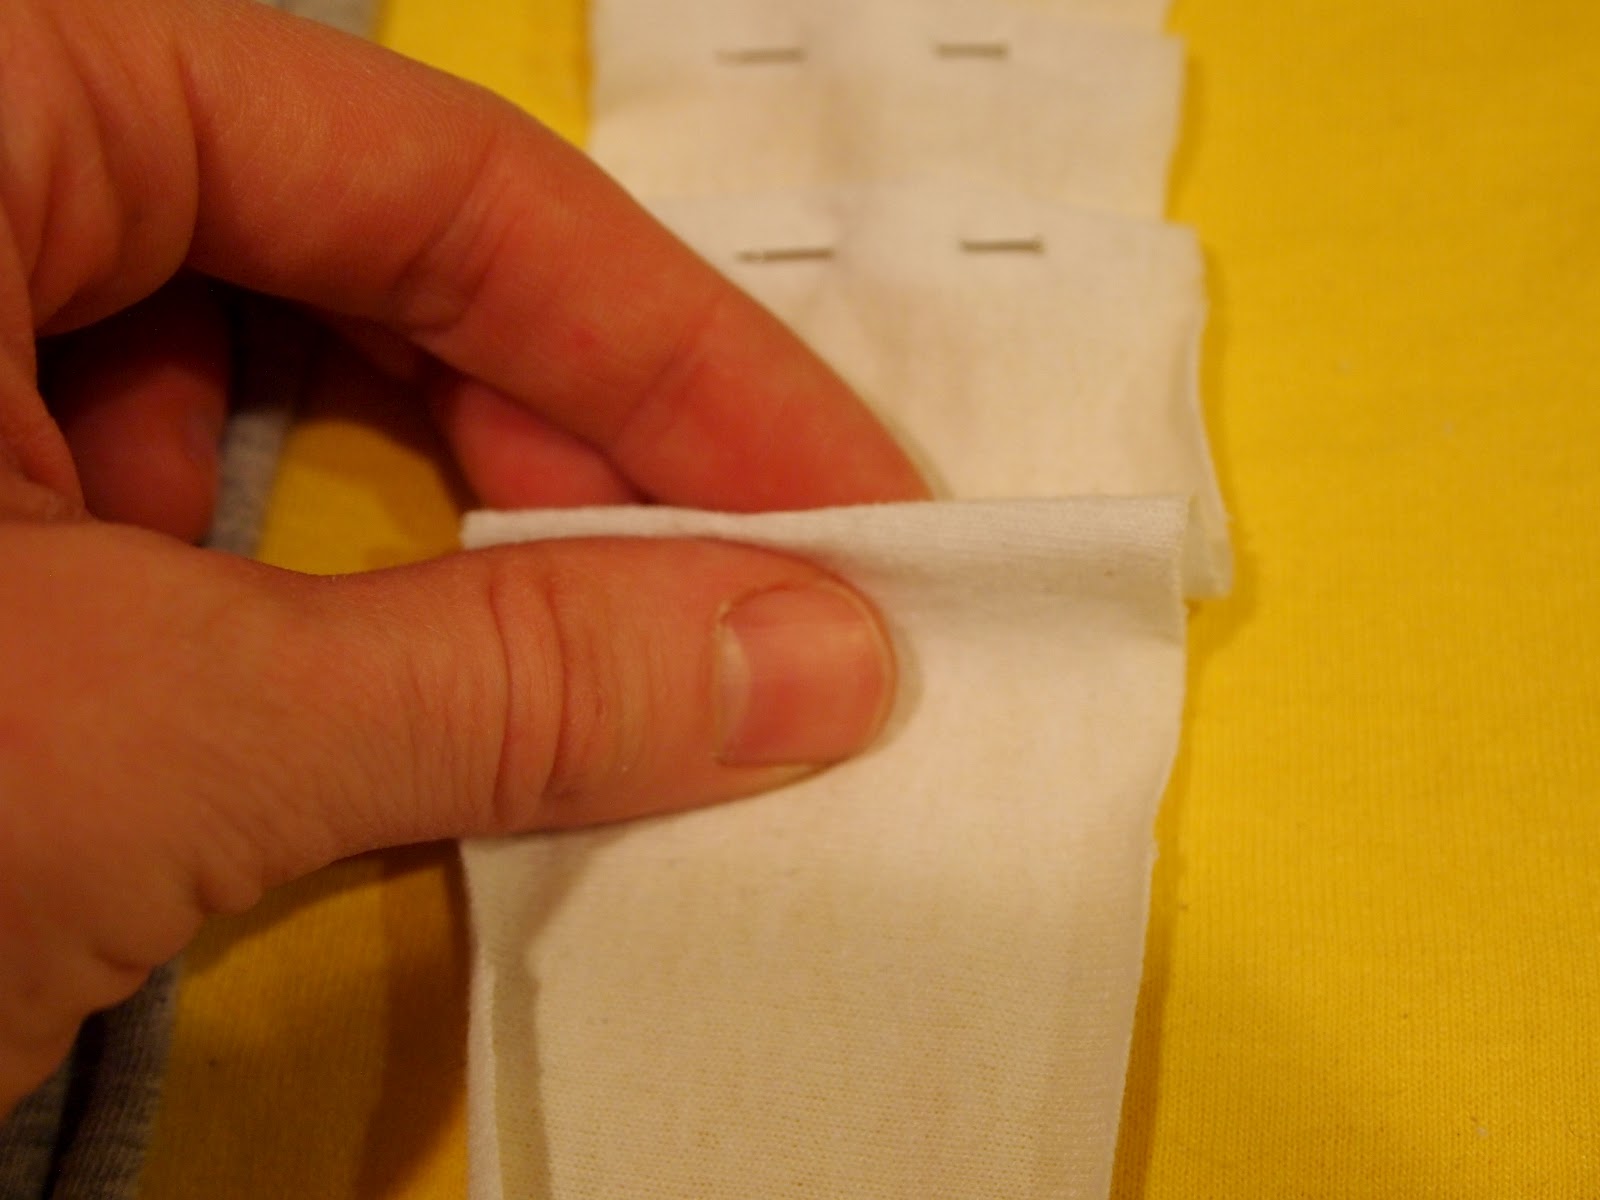
Take the white t-shirt (or whatever your complimentary color is) and cut it across the body just under the arms, and then just cut up one side of the tube to open it into a long rectangle.
Then cut long strips about 2 1/2' wide. I wanted to make sure I had enough fabric so I made the strips longer than I needed them, then just cut off the extra when I was done folding it onto the pillow cover.
I made 5 white strips for my pillow.
I also used some grey fabric off of an old sheet, and cut it into strips that were slightly thinner.
Then, play around with the fabric to decide where you want to place your ruffles/stripes.
Here is the beautiful part about using t-shirt fabric for this project: You don't have to hem anything. Because Jersey/knit fabric doesn't fray, you don't have to worry about hemming all of those long strips of fabric! Hallelujah!!
Moving on.
So you have all of your strips and your pillow cover cut out, now you get to sew!
Firstly, make sure your fabric is inside out. (so the seams won't show.)
Sew around 3 sides of the pillow cover, leaving the bottom part that was the hem of the t-shirt open. Make sure you backstitch at the beginning and the end of sewing, to anchor your seams. Otherwise your pillow cover won't stay sewed shut!
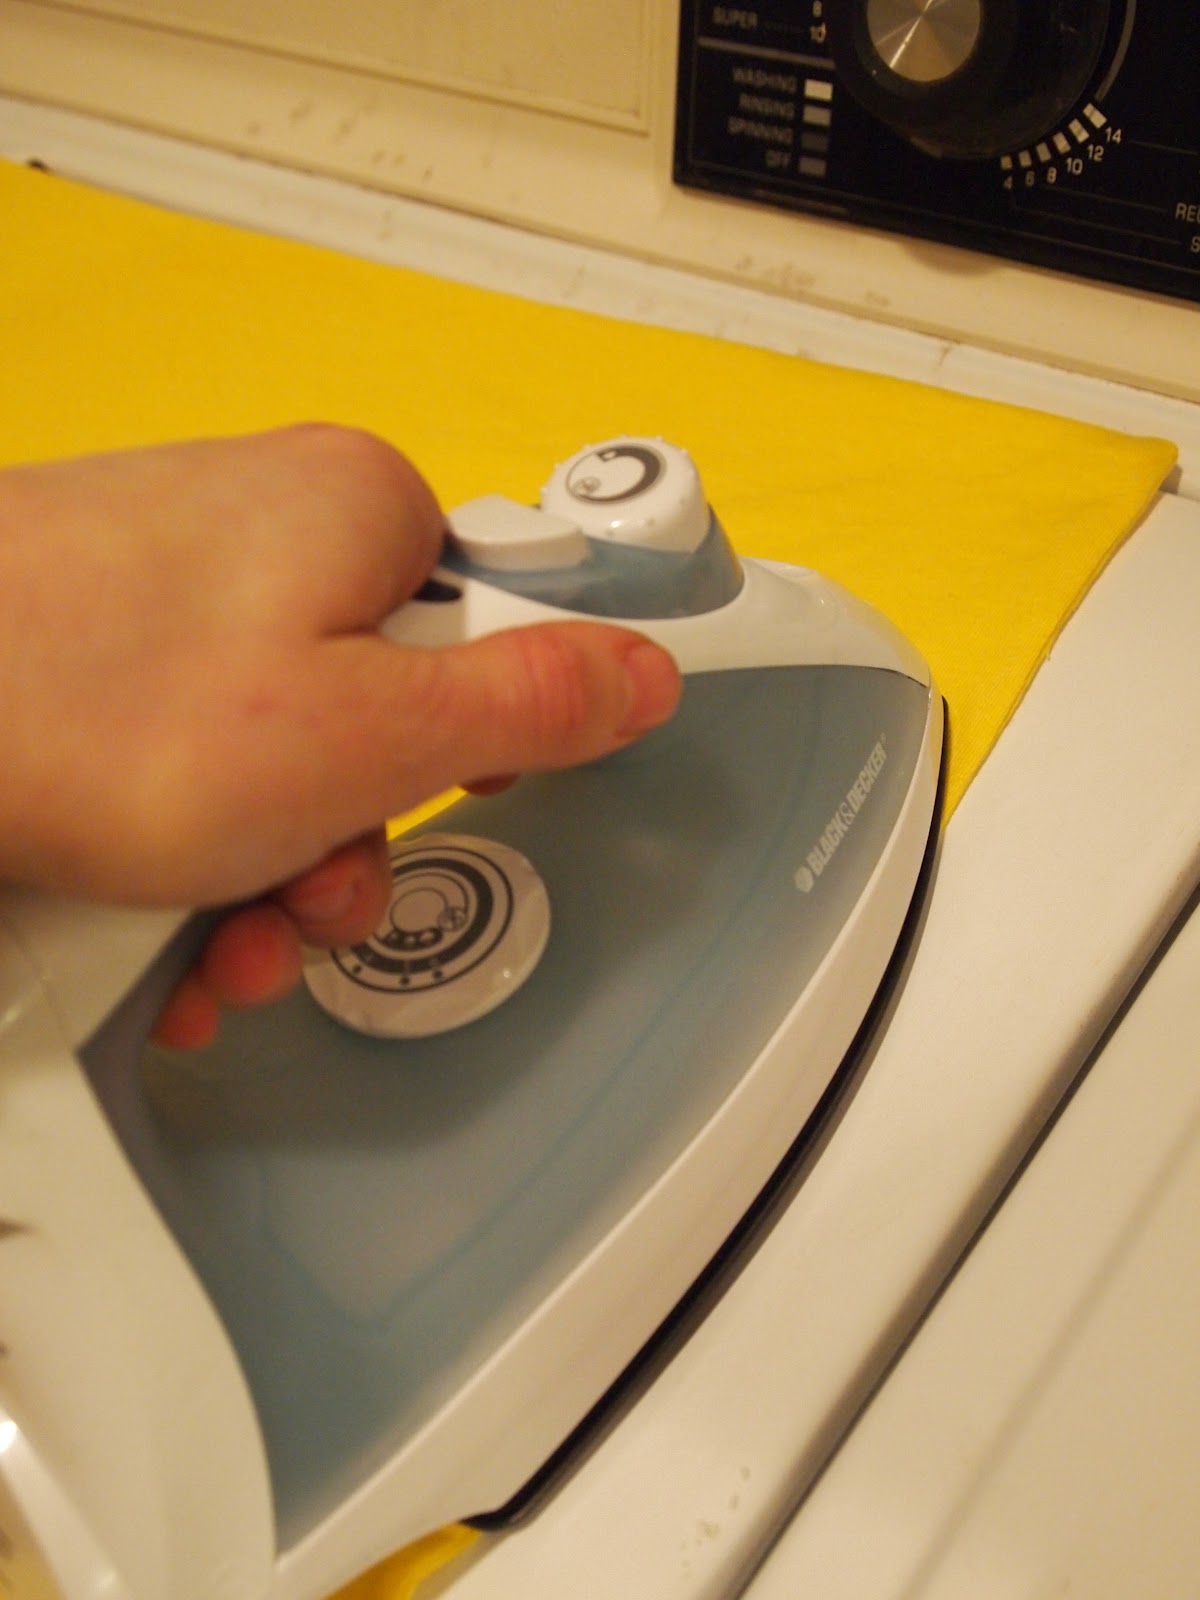
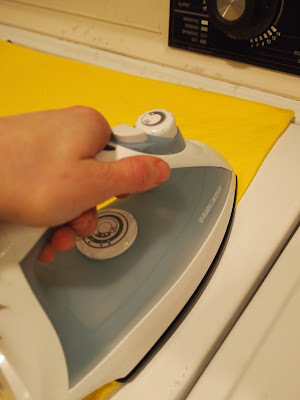
Then cut off the extra fabric at the corners, turn your pillow cover right side out and iron the seams flat.
Trust me on this one, it looks SO much better if you take the 39 seconds to iron out the seams.
It makes the pillow look more store bought and not 'handmade' in that undesirable way.
| I zigzagged my edges too, just for extra durability. You can do this, or not. It's your preference. |
| Iron those seams nice and flat! |
Now comes the slightly tedious part.
The pleating.
Take a long strip of fabric and figure out how big of a pleat you want. I folded mine up about an inch/ inch and a half. Keep in mind that you do not have to be perfect at this, it is very forgiving. :)
I started the pleats hanging about halfway off the side of the pillow, because I liked how that looked. You can do whatever you like. :)
Simply fold the fabric, making a pleat, then pin. Then repeat.
Again
and again
and again
and again
Til your whole strip is pleated.
Then, if you want to do straight lines in between the pleated strips like I did, just attach the next one with 3 or 4 pins to secure it to the fabric.
Then do the pleating again, alternating with the strips of straight fabric, if desired, til your pillow cover is completely pinned and pleated.
Make sure that when you are pinning, your pins only go through the first layer of fabric. If they go through both, you'll just have to unpin them and start over. Ask me how I know this. ;)
FINALLY, when you get all of your strips pinned, it's time to sew them on.
Go slow here, because you will have about a bajillion pins to take out as you sew.
Sew down the pleats slightly to one side, then once you have finished that line, go down the same strip of pleats slightly to the other side, so you have two lines of sewing, spaced apart about 1/4-1/2'. This helps hold those pleats in, and helps give the pillow a finished look.
Unless, like me you can't sew straight lines, then parts of the pillow look finished and parts look slightly...wonky. But hey, nobody looks that closely, right??
When sewing the straight strips of fabric, just sew down the middle, then slightly pull the ends to make them curl in on themselves. Cut off the excess fabric, and congratulate yourself on almost being finished!
Lastly, you just have to stuff the pillow cover.
If you have batting, go to town stuffing, making sure that the corners are nice and filled out and that you don't get too much stuffing in there because your pillow will end up lumpy.
If you have a pillow form, just slide it into the cover and then fold the hemmed bottom part of the t-shirt up into the pillow cover, making sure it's nice and straight. Iron it to get some creasing on there so you can follow the line when you sew.
You can pin this together as well, if you want.
After all of that pinning from the pleats, I didn't really ever want to see a pin again so I just sewed it carefully, going back to correct any small pieces I missed. Sew across the bottom of the pillow, making sure to get both sides of the fabric.
If you're stuffing batting, you can sew part of the bottom when you sew the other three sides, just make sure to leave a hole big enough to get your whole hand into the pillow so you can arrange the batting nicely when you're stuffing it. Then fold the hem under and sew either with a slipstitch by hand, or sew with your machine.
That's it, you're done! Hooray!
Now, go try out your new pillow!!
This post is shared at Frugally Sustainable.
Subscribe to:
Posts (Atom)