I may have just what you are looking for.
Remember, way back when I wrote about making headbands and flowers??

Well, today I am going to show you how to make those cute little fabric flowers. They are technically called yo-yo's; but when I hear the word yo-yo, I think of, well, a yo-yo.

So to keep from confusing myself and possibly you, I am calling them fabric flowers.
Easy Fabric Flowers


You will need:

~A needle
~Thread (You can coordinate it to your fabric if you want, but the only part that will show is where you sew the button on, if you choose to do that. So coordinate your thread to your buttons, or just use whatever you have on hand.)
~ Scissors
~A bowl, large mug or other round object to trace around
~ A pencil or pen, or disappearing ink pen
~Buttons (optional.)


First; find some fabric. You only need a little bit, so this is a great way to get rid of those scraps of fabric we all have lying around waiting to be used.
Get your bowl or mug, and trace around the lip of it directly onto the fabric, making a nice circle. You can mark on the back of the fabric if you want, but the marks won't end up showing if you draw on the right side of the fabric, because you're folding over the edges.
 |
| This is actually me pretending to trace on my table cloth, just for illustration principles. I already had circles cut out, but wanted to show you this part. :) |
Your finished flower will be roughly 1/2 the size of your circle. I usually use a big old mug I got at the dollar store that is 4 3/4 in. in diameter and end up with about a 2 in. fabric flower. So if you want a flower bigger than that, use a bigger bowl!
Cut out your circles.

Then thread your needle. Pull the thread down so that both ends are even, then tie them together into a knot. This ensures that your needle won't come un-threaded while you're sewing.

Fold about 1/4 in. of the circle over with your thumb, and slide the needle through it. I find that it is easiest to push the needle in and out of the thread a few times without pulling the thread all the way through each time, then when your fabric is nearly covering your needle pull the thread through. This way you get several gathers each pull, and it seems to save you a little bit of time. Here's a picture, so you can see what I mean:


As you sew, your fabric will start to pucker. This is good! It's what's supposed to happen.
It will look kind of like a sunbonnet...

(I went through a major Laura Ingalls Wilder phase as a child, and actually had my aunt make me a sunbonnet to wear with my dresses. I loved that thing!)
Then, as you are coming to the end of the circle, it will kind of look like a shower cap. For your finger. :)

If your fabric ends up inside out, don't worry!
Just flip it right side out.
Then smush it down in the middle, and you have a fabric flower!!

How easy was that?
If the gathering is somewhat uneven, (mine always is) just kind of tug it around to how you like it, then make tiny little stitches around the inside edges through to the back of the flower to hold them there. This is especially useful if you're going to attach a button. If you just want to leave it without a button, just cut the thread with enough room to tie a knot, tie a nice knot on there, and trim the excess thread. You're done!
If you want to attach a button, just pull the inside edges of the flower so they'll be covered by the button, stitch them down and then sew on the button. I usually do this all on the same piece of thread, without cutting and tying a knot after making the flower.
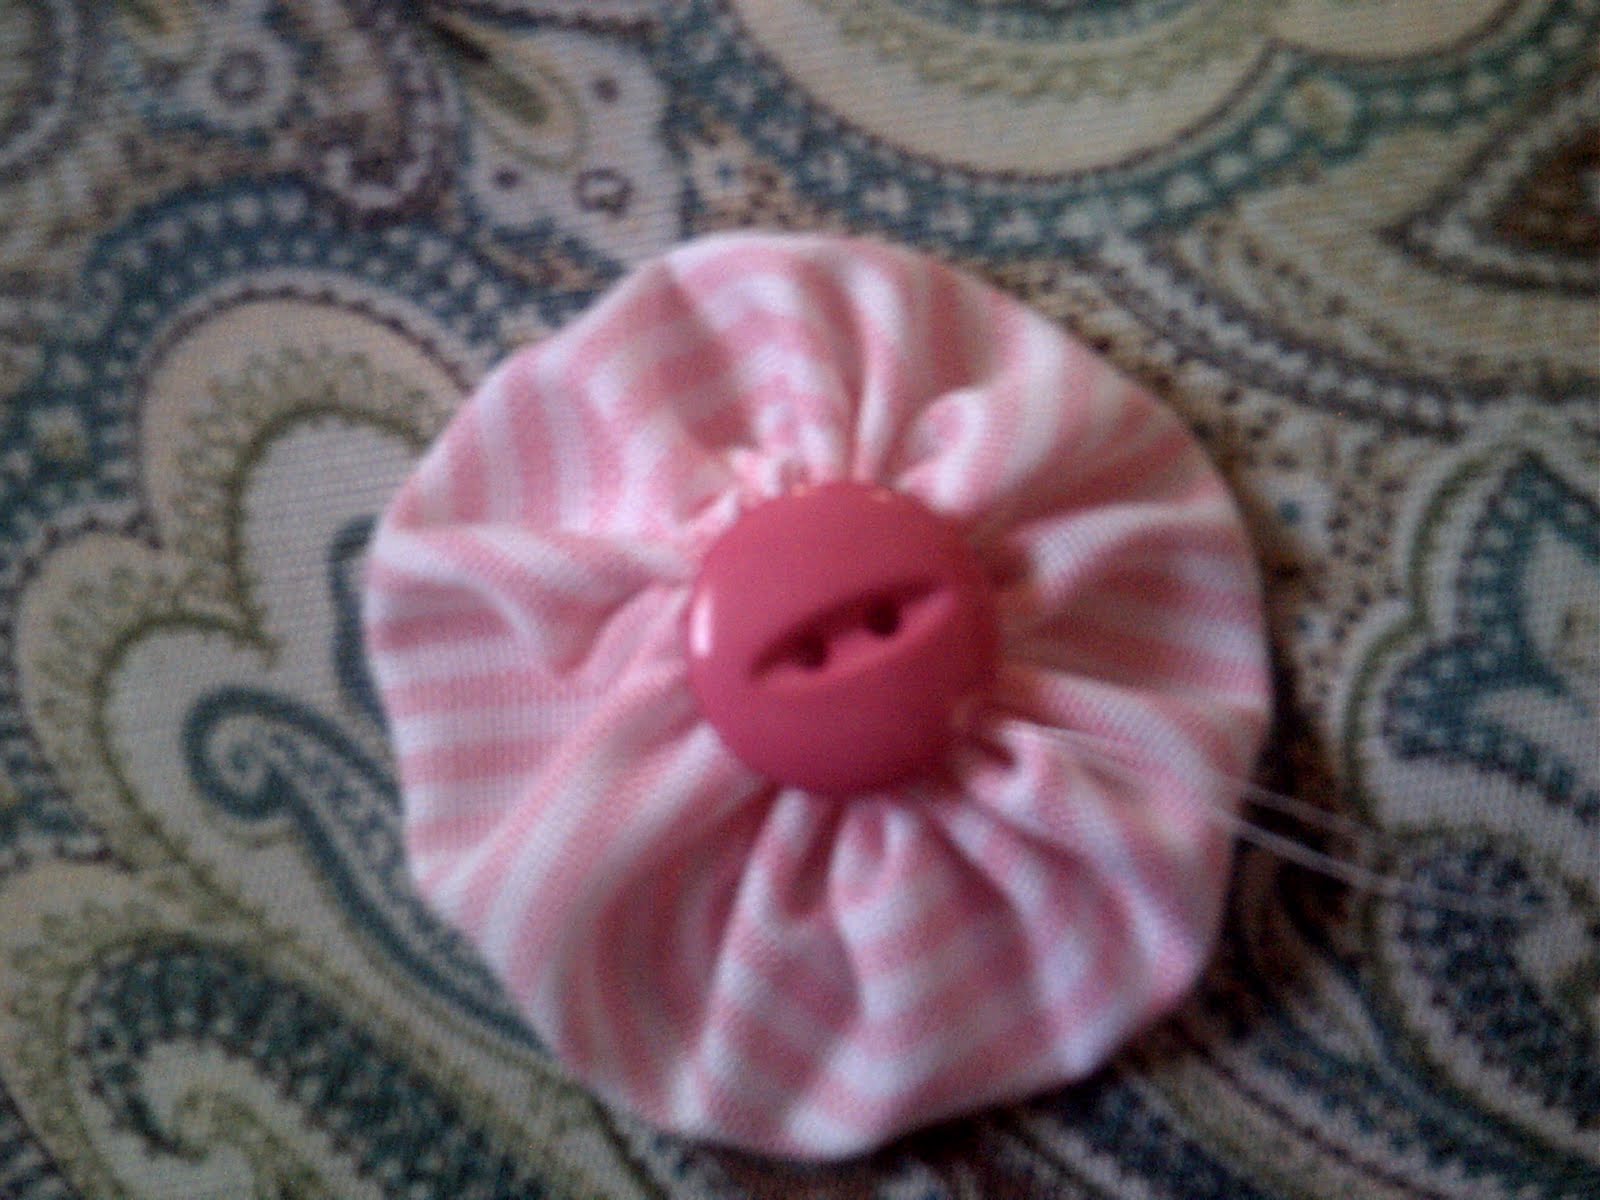 |
| This is me making sure the button covers the hole in the middle. |
 |
| And, after sewing on the button. |
If you want to, you can hot glue a clip or pin onto the back of the flower, so you can pin it to your jacket, purse, shirt, etc.
Or you can sew these cute little flowers to anything for a more permanent flair.
So, go make some! For your sister, mother, aunt, friends, daughter, and of course yourself. :)


And then come tell me about it.- I'd love to see your creations! :)
No comments:
Post a Comment